3.6 Converting documents
After setting up a conversion project, follow these steps to convert a FrameMaker document:
1. Open a document in FrameMaker. To convert all the files in a book, select the book file. Even if a few files in the book do not need converting, this is usually faster than converting each file separately.
2. Select a conversion project.
On the FrameMaker File menu, choose
Save Using Mif2Go... The Choose Project dialog opens (see Figure 3
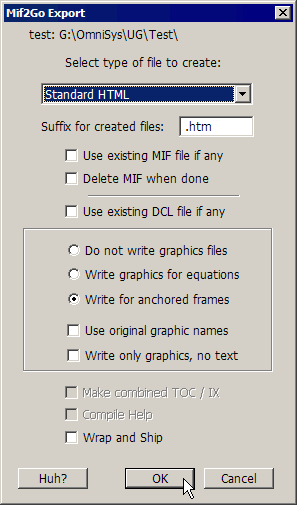
3. Choose export options.
When you dismiss the Choose Project dialog,
the Mif2Go Export dialog
opens (see Figure 3
4. Start the conversion. Click OK in the Mif2Go Export dialog to start converting documents.
During conversion, Mif2Go displays progress messages in the status bar at the bottom of the book or file window.
Run the conversion the first time with just the settings you specified in the Set Up dialog, then fine-tune after you examine the output. Always make the minimum number of changes, and only after trying out the default values; Omni Systems developers work hard to make the defaults reasonable for most purposes.
You can keep a text editor open while trying different settings, using File > Save in the editor to update the configuration file (see §2.3 Understanding Mif2Go configuration files), then File > Save Using Mif2Go... in FrameMaker to run the conversion again.
Figure 3


